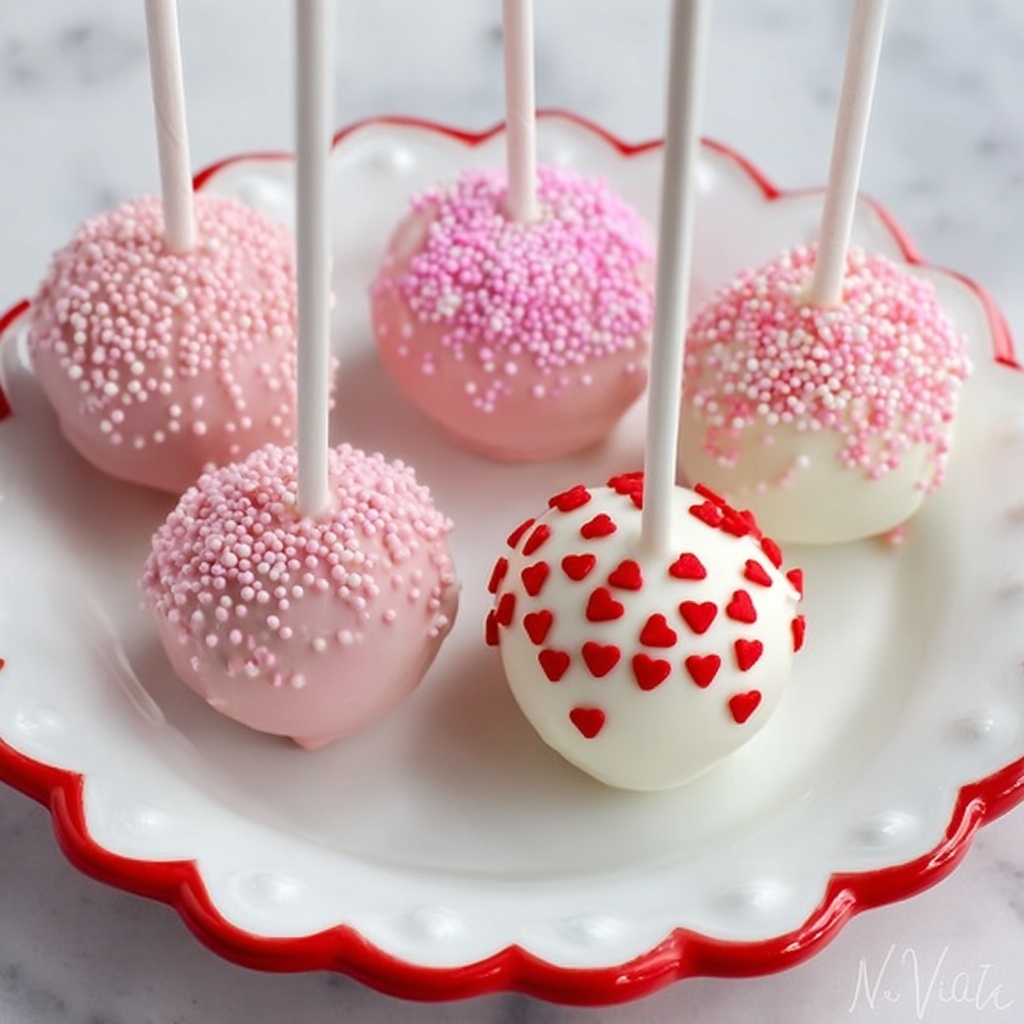
If you’ve ever wanted to bring a whimsical, irresistible treat to your next party or cozy gathering, this Strawberry Cake Pops Recipe is your new best friend in the kitchen. Imagine moist, flavorful strawberry cake transformed into perfectly bite-sized pops, coated in luscious vanilla chocolate with a playful pink or red hue. These delightful treats are not only stunning to look at but also bring that sweet, fruity burst with every bite. Whether you are making them for a special occasion or just to brighten your day, these strawberry cake pops are guaranteed to become a crowd favorite.
Ingredients You’ll Need
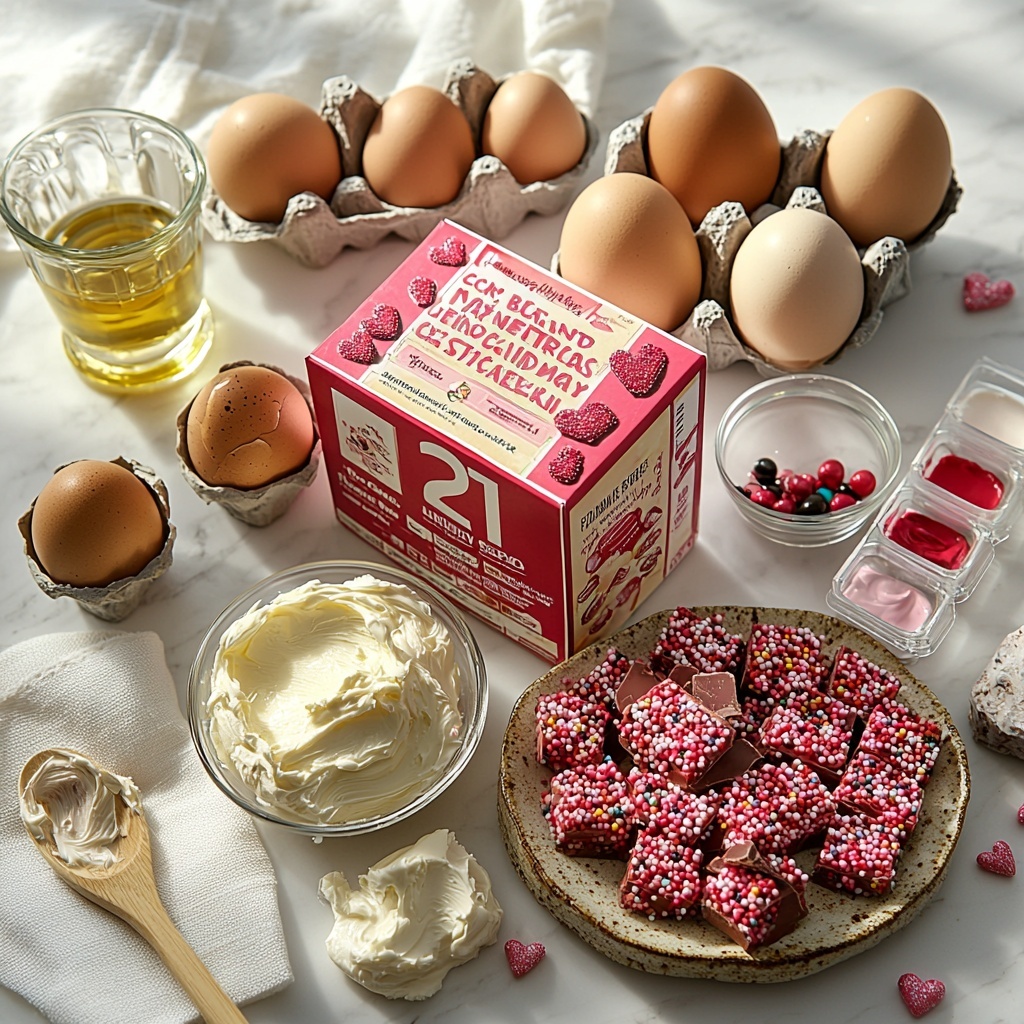
The beauty of this recipe lies in its straightforward ingredient list, each playing a crucial role in creating moist, colorful, and delicious cake pops. From the base strawberry cake mix giving that lovely fruit essence, to the melting chocolate that adds a silky coating, every component is essential.
- 1 package strawberry cake mix: This forms the flavorful, fruity foundation of your cake pops.
- 1 cup water: Vital for hydrating the cake mix and achieving the perfect batter consistency.
- 1/2 cup vegetable or canola oil: Adds moisture and richness to the cake.
- 3 large eggs: Bind the ingredients while lending structure to the cake.
- 2 tablespoons canned white, vanilla, or cream cheese frosting: Helps bind the crumbled cake into pop-worthy balls and adds sweetness.
- 20 ounces vanilla melting chocolate or almond bark: Creates a smooth, shiny coating that holds the cake pops together.
- Pink or red food coloring gel: Gives the coating a festive, eye-catching color perfect for Valentine’s Day or any fun occasion.
- Valentine’s Day sprinkles: Adds texture and a charming decorative touch to finish each pop.
How to Make Strawberry Cake Pops Recipe
Step 1: Prepare the Cake
Start by preheating your oven according to the package instructions. Combine the strawberry cake mix with water, oil, and eggs in a mixing bowl, mixing until smooth. Pour this vibrant batter into a greased 9×13-inch baking pan. Bake the cake as directed, filling your kitchen with that unmistakably delicious strawberry aroma.
Step 2: Cool the Cake
Once baked, let your strawberry cake cool completely on a wire rack. This step is crucial—trying to crumble warm cake results in a messier process, and cool cake ensures the crumbs come out perfectly fine and easy to handle.
Step 3: Crumble the Cake
Now, using a fork or your hands, break the cooled cake into fine crumbs inside a large mixing bowl. This is where the magic begins—turning your beautiful cake into bite-sized bits ready for shaping.
Step 4: Add Frosting and Mix
Add 2 tablespoons of your chosen frosting to the bowl of crumbs and mix thoroughly. Use your hands or an electric mixer to combine until the mixture holds together like dough. If the mixture seems too dry, gradually add a little more frosting to reach the right consistency for rolling.
Step 5: Form Cake Balls
Using your hands, roll the mixture into 1-inch balls and place them on a parchment-lined baking sheet. This will be the perfect size for delicious bite-sized pops that everyone will love.
Step 6: Insert Sticks
Melt a small amount of the vanilla melting chocolate or almond bark. Dip the tip of each cake pop stick into this melted coating before inserting it halfway into each cake ball. This step helps secure the stick firmly in place. Place the cake pops in the fridge for about an hour so they can firm up nicely.
Step 7: Color the Coating
While the cake pops chill, melt the remaining chocolate in the microwave. Divide it into two bowls; add pink or red food coloring gel to one bowl and stir until you achieve your desired shade. This colored coating makes the pops festive and fun!
Step 8: Coat the Cake Pops
Dip each chilled cake pop into the melted chocolate to cover completely. Gently scrape off any excess on the side of the bowl and place the pops upright in a holder or in a foam block to let the coating set evenly. This step creates that smooth, shiny shell that’s as delightful to the eye as it is to the palate.
Step 9: Decorate and Chill
Before the chocolate hardens, quickly sprinkle Valentine’s Day sprinkles on top for that perfect pop of color and whimsy. Let the coating fully harden at room temperature, then chill the cake pops until you’re ready to serve these charming treats.
How to Serve Strawberry Cake Pops Recipe
Garnishes
To take your strawberry cake pops to the next level, add a touch of elegance with edible glitter or finely chopped freeze-dried strawberries sprinkled atop the coating. These garnishes not only add visual appeal but enhance the fresh strawberry flavor that makes this recipe so special.
Side Dishes
These cake pops pair beautifully with light fruit salads or a simple vanilla yogurt dip for those who want a little extra creaminess. They can also be served alongside iced tea or sparkling lemonade to balance the sweetness and refresh your palate.
Creative Ways to Present
Display your cake pops in a colorful floral foam block wrapped with pretty paper or place them in a decorative vase filled with candies or sprinkles that complement the cake pops’ colors. You can even customize the sticks with ribbons or themed tags for parties or celebrations, making your Strawberry Cake Pops Recipe a centerpiece that everyone will admire.
Make Ahead and Storage
Storing Leftovers
Store strawberry cake pops in an airtight container in the refrigerator to keep them fresh. They maintain their flavor and texture well for up to 4 days, making them perfect for preparing in advance or enjoying as a sweet treat throughout the week.
Freezing
If you want to make these ahead for later use, strawberry cake pops freeze wonderfully. Place them on a baking sheet to freeze until solid, then transfer to a freezer-safe container. They’ll keep up to 2 months frozen, ready to bring joy anytime with minimal effort.
Reheating
When you’re ready to enjoy frozen pops, simply thaw them in the refrigerator for several hours or overnight. Avoid microwaving directly to preserve their texture and coating. Once thawed, they’re just as delightful as the day you made them.
FAQs
Can I use homemade strawberry cake instead of a mix?
Absolutely! Feel free to swap out the boxed cake mix with your favorite homemade strawberry cake recipe. Just ensure it’s fully cooled before crumbling and proceed with the recipe as usual.
What if I don’t have vanilla melting chocolate?
You can substitute with white chocolate chips or candy melts available at most stores. Just be sure to melt gently to avoid burning and to achieve a smooth coating for your cake pops.
How do I keep the cake pops from falling off the sticks?
Dipping the stick tip in melted chocolate before inserting it into the cake ball is key—it acts like glue. Also, chilling the pops after insertion gives the coating time to set, securing the stick firmly in place.
Can I use different food coloring for other occasions?
Definitely! This Strawberry Cake Pops Recipe is versatile. Use any food coloring gel to match the theme or occasion—blue for baby showers, green for St. Patrick’s Day, or even multi-colored for birthdays.
Is it possible to make these gluten-free?
Yes! Start with a gluten-free strawberry cake mix and ensure all other ingredients like sprinkles and frosting are gluten-free to safely enjoy these pops without the gluten.
Final Thoughts
Nothing beats the charm and joy of making your own Strawberry Cake Pops Recipe from scratch. Each bite is a celebration of flavor and fun that you can share with friends and family. Once you try making these, it’s hard not to come back for more, and even better, to experiment with your own creative twists. So grab your mixing bowl, preheat that oven, and dive into crafting these irresistible strawberry gems—you’ll be the star of any event!
Print
Strawberry Cake Pops Recipe
- Prep Time: 20 minutes
- Cook Time: 30 minutes
- Total Time: 1 hour 50 minutes
- Yield: 22 servings
- Category: Dessert
- Method: Baking
- Cuisine: American
Description
Delightfully sweet and festive, these Strawberry Cake Pops feature moist strawberry cake mixed with creamy frosting, coated with vibrant pink and red melting chocolate, and topped with fun Valentine’s Day sprinkles. Perfect for parties and celebrations, these bite-sized treats are both visually charming and deliciously satisfying.
Ingredients
Cake
- 1 package strawberry cake mix
- 1 cup water
- 1/2 cup vegetable oil or canola oil
- 3 large eggs
Frosting
- 2 tablespoons canned white, vanilla, or cream cheese frosting
Coating & Decoration
- 20 ounces vanilla melting chocolate or almond bark
- Pink or red food coloring gel (for half of the cake pops)
- Valentine’s Day sprinkles
Instructions
- Prepare the Cake: Preheat your oven and prepare the strawberry cake mix according to package instructions by combining the cake mix, water, oil, and eggs. Pour the batter into a 9×13-inch baking pan and bake as directed on the package.
- Cool the Cake: Remove the cake from the oven and allow it to cool completely so it is easy to crumble and handle.
- Crumble the Cake: Using a fork, crumble the entire cooled cake into fine crumbs in a large mixing bowl.
- Add Frosting and Mix: Add 2 tablespoons of frosting to the cake crumbs. Mix thoroughly using your hands or an electric mixer until the crumbs hold together and form a ball. Add a little more frosting if necessary to achieve proper consistency.
- Form Cake Balls: Roll the dough into 1-inch balls and place them on a baking sheet lined with parchment paper.
- Insert Sticks: Melt a small amount of almond bark or melting chocolate in the microwave. Dip the tip of each cake pop stick into the melted chocolate and then insert it into each cake ball. Refrigerate the pops for 1 hour to firm up.
- Color the Coating: Melt the remaining almond bark in the microwave and divide it into two separate bowls. Add pink or red food coloring gel to one bowl and stir until the desired shade is achieved.
- Coat the Cake Pops: Dip each cake pop into the melted chocolate to completely coat it. Scrape off excess chocolate on the side of the bowl. Repeat for all cake pops. Place them upright in a holder or foam base to allow the coating to harden.
- Decorate and Chill: Quickly sprinkle Valentine’s Day sprinkles onto the cake pops before the chocolate hardens. Allow the coating to fully set, then chill the cake pops until ready to serve.
Notes
- For a firmer cake pop, chilling the cake balls before dipping helps hold their shape better.
- You can use different colors of food coloring to customize cake pops for any occasion.
- Be sure to work quickly when decorating to prevent the coating from hardening prematurely.
- If almond bark or melting chocolate is unavailable, white chocolate chips can be used as a substitute but may require additional melting aids like shortening.
- Store cake pops in an airtight container in the refrigerator for up to 3 days.


