“`html
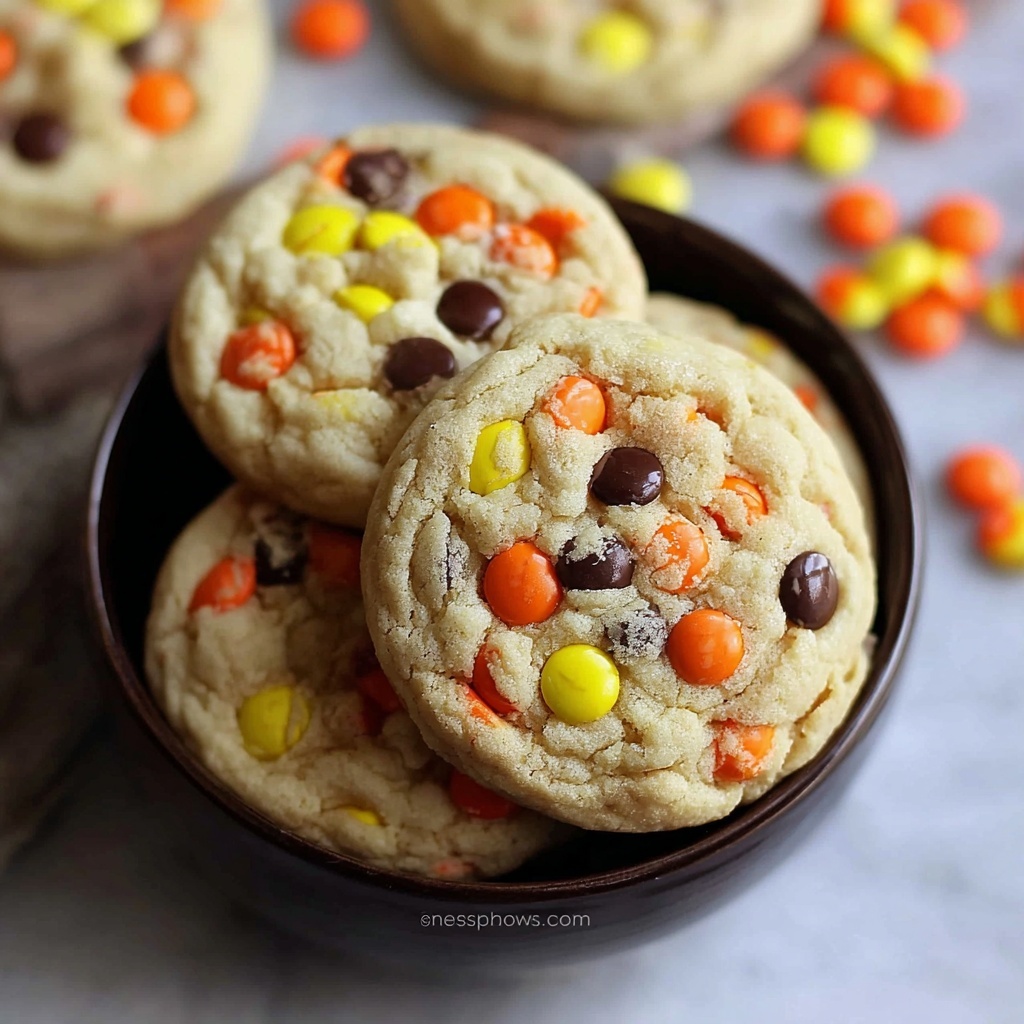
Get ready to delight your friends and family with the enchanting and whimsical Halloween Cauldron Cookie Creation Recipe. These spooky, bubbling cauldron cookies are not only a feast for the eyes but also a treat bursting with chocolatey goodness and festive fall colors. Perfect for Halloween parties or just some cozy baking fun, this recipe combines a chewy cookie base with gorgeous royal icing decorations that transform ordinary cookies into magical potions bubbling over with charm and creativity.
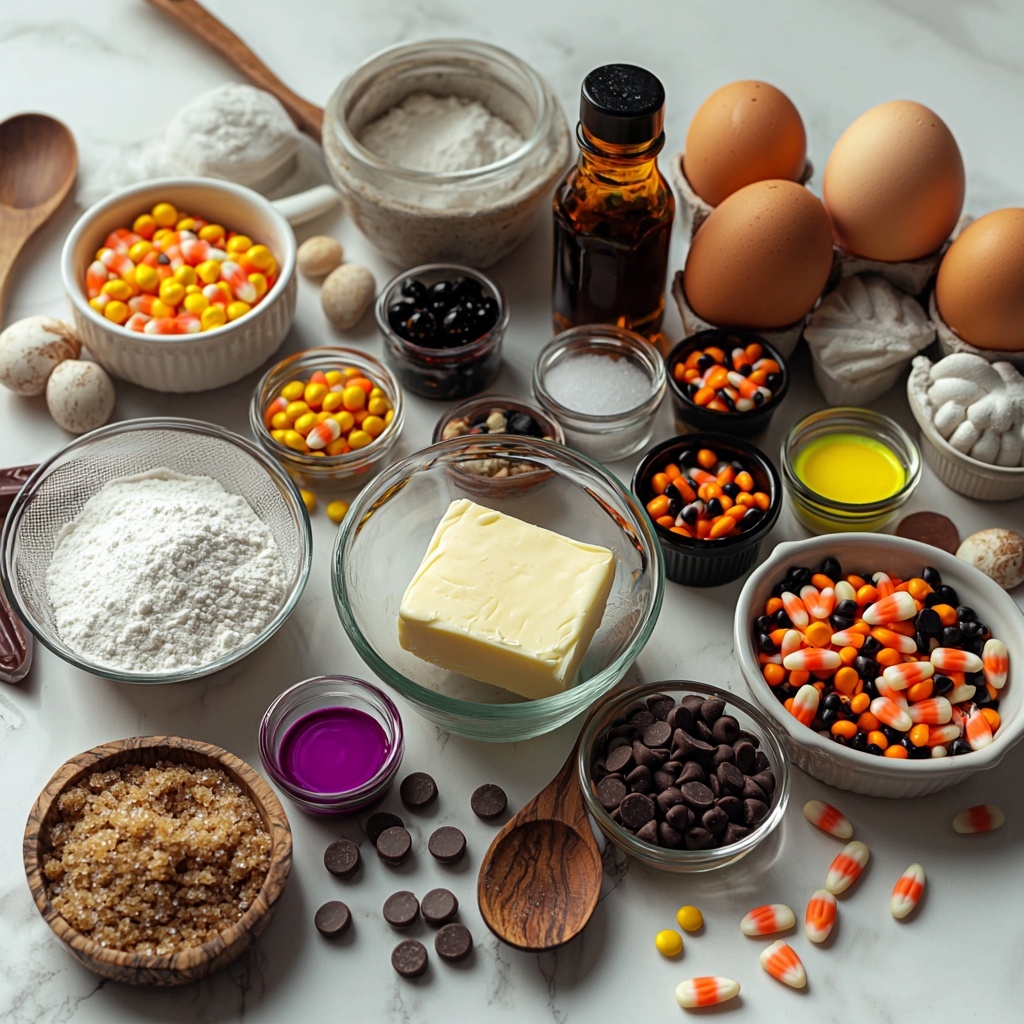
Ingredients You’ll Need
To craft these Halloween Cauldron Cookies, you’ll need a mix of everyday staples and a few specialty items that bring both flavor and vibrant personality. Each ingredient plays a crucial role — from creating the soft, chewy texture of the cookie to making the icing colors pop and sparkle just like a witch’s brew bubbling in a cauldron.
- 1 cup unsalted butter, softened: This adds rich moisture and helps create that perfectly tender crumb you’ll love.
- 1 cup granulated sugar: For sweetness and a slight crispness around the edges.
- 1 cup brown sugar, packed: Brings a deep, caramel-like flavor and chewy texture.
- 2 large eggs: Bind everything together while lending structure and moisture.
- 2 teaspoons vanilla extract: Enhances the cookie’s warm, comforting aroma and flavor.
- 3 cups all-purpose flour: The sturdy base for your cookies, ensuring they hold their charming shapes.
- 1 teaspoon baking soda: Provides just enough lift for tender cookies.
- 1/2 teaspoon salt: Balances out sweetness and elevates all the flavors.
- 1 cup chocolate chips: Little pockets of melty deliciousness trapped inside each cookie.
- 1 cup candy corn: Classic Halloween sweetness adds color and chewy contrast.
- 4 cups powdered sugar, sifted: Essential for the smooth, glossy royal icing.
- 3 tablespoons meringue powder: Gives the icing structure and helps it dry hard.
- 1/2 teaspoon clear vanilla extract: Keeps the icing flavor subtle and sweet without clouding colors.
- 6-8 tablespoons warm water: Adjusts the icing consistency for intricate decorating.
- Green gel food coloring: For that spooky bubbling potion effect.
- Purple gel food coloring: Adds mystical swirls to the bubbling brew.
- Black gel food coloring: Used for the cauldron’s base outline and flooding.
- White gel food coloring: Creates highlights and fun detailing.
- Orange gel food coloring (optional): Adds warmth and festive Halloween flair.
- Edible glitter (optional): Gives your potions a magical shimmer that catches the light.
- Various Halloween sprinkles (optional): Add texture and playful spookiness.
- Small candy eyes (optional): For a quirky, creepy-cute effect that brings your cauldrons to life.
How to Make Halloween Cauldron Cookie Creation Recipe
Step 1: Prepare Cookie Dough
Start by whisking together the dry ingredients—flour, baking soda, and salt—in a bowl. Separately, cream the softened butter with both sugars until the mixture is light and fluffy, which ensures your cookies come out soft yet structured. Add eggs and vanilla for richness, then gradually fold in the dry ingredients. Add in the chocolate chips and candy corn last to ensure even distribution without breaking them up too much. Chill the dough for at least an hour to make it easier to work with and to deepen the flavors.
Step 2: Bake Cookies
Preheat your oven to 375°F (190°C). On a lightly floured surface, roll out the chilled dough to about 1/4 inch thickness and cut out fun cauldron shapes, or simply scoop dollops for a more rustic look. Place them on parchment-lined baking sheets to prevent sticking. Bake for 8-10 minutes, just until the edges set lightly but the centers remain soft for that perfect chew. Cool completely on a wire rack before decorating.
Step 3: Prepare Royal Icing
Now onto the magic of decorating! Sift powdered sugar and meringue powder together, then add clear vanilla extract and warm water. Beat until the icing is thick, glossy, and forms stiff peaks—which typically takes 5-7 minutes. Adjust your icing’s thickness depending on its use: thicker for outlining and thinner for flooding. Divide the icing into portions and color each with your festive gel food colors—green, purple, black, white, and, if you like, orange. Keep the icing covered to prevent it from drying out as you work.
Step 4: Decorate Cauldron Base
Using the black outlining icing, carefully pipe a cauldron shape around each cooled cookie. This sets the stage for your spooky masterpiece. Allow the outline to dry for about 10-15 minutes, then flood the outlined area with black icing, spreading it evenly and popping any air bubbles for a smooth finish. Let this base dry completely—several hours or overnight is ideal—to create a sleek background that enhances your vibrant potion decorations.
Step 5: Add Bubbling Potion
Once the black bases are dry, it’s time to bring your cauldrons to life! Pipe a wavy green outline at the top edge to simulate the potion’s lip, and let it set briefly. Flood the inside of this lip area with green icing, then while still wet, drop dots of purple, white, and dark green or black icing randomly. Use a small tool or toothpick to gently swirl these dots, creating a mesmerizing bubbling potion effect that looks like it’s fizzing right before your eyes. Allow this layer to dry completely—preferably 6-12 hours or overnight—for best results.
Step 6: Add Final Spooky Touches
After all icing layers are dry, sprinkle on edible green or iridescent glitter to give your potion a shimmering glow. Attach small candy eyes, Halloween sprinkles, or tiny icing “bones” for added spooky charm, securing them with small dots of royal icing. Let these final details set for at least an hour before serving or packaging to keep your creations looking pristine and ready to wow.
How to Serve Halloween Cauldron Cookie Creation Recipe
Garnishes
Enhance your Halloween Cauldron Cookie Creation Recipe by adding whimsical garnishes like tiny candy eyes or colorful Halloween sprinkles to amplify the eerie, fun vibe. Edible glitter isn’t just for looks—it adds a magical sparkle that makes these treats truly captivating under party lights or glow-in-the-dark decorations.
Side Dishes
Serve these cookies alongside warm apple cider or a rich hot chocolate for the ultimate cozy Halloween experience. The spicy sweetness of cider complements the cookie’s buttery chocolate tones, while hot chocolate adds creamy comfort that guests will adore. You could even arrange these cauldron cookies around a pumpkin-shaped cheese board for festive fun.
Creative Ways to Present
Get imaginative by displaying your Halloween Cauldron Cookie Creation Recipe on a themed platter surrounded by faux spider webs or mini pumpkins. Place each cookie in a decorative cupcake liner for easy serving, or stack them as “potion ingredients” in a glass jar for a unique gift idea. These ideas make your cookies the life of any Halloween gathering.
Make Ahead and Storage
Storing Leftovers
If you have any of these bewitching cookies left over, store them in an airtight container at room temperature for 3-4 days. This keeps both the chewy cookie and the intricate royal icing decorations fresh and tasty without softening or cracking.
Freezing
You can freeze the cookies before decorating by wrapping them tightly in plastic wrap and placing them in a freezer-safe bag for up to 2 months. For decorated cookies, freeze uncovered on a baking sheet until firm, then transfer to an airtight container with layers separated by parchment paper. Thaw at room temperature before serving to preserve their spellbinding appearance.
Reheating
No need to reheat! These cookies are best enjoyed at room temperature to appreciate the blend of chewy texture and crisp royal icing details. If preferred warm, gently microwave a cookie for 5-7 seconds, but be cautious as this might soften the icing slightly.
FAQs
Can I use regular food coloring instead of gel food coloring?
Gel food coloring is recommended because it provides vibrant colors without thinning your royal icing. Regular liquid coloring can make the icing too runny, which affects the design and drying time.
What if I don’t have a cauldron-shaped cookie cutter?
No worries! You can cut freehand shapes on rolled dough or simply bake the dough as drop cookies and decorate the tops to look like cauldrons and bubbling potions. Creativity is the key!
Can I make this recipe vegan or gluten-free?
This recipe relies on butter, eggs, and all-purpose flour, so adapting it requires substitutes like vegan butter, egg replacers, and gluten-free flour blends. However, you might need to experiment to get similar textures and flavors.
How long does the royal icing take to dry completely?
Royal icing can take several hours up to overnight to fully dry, especially the thicker flooding layers. Patience here ensures your decorations stay shiny and intact for display or gifting.
Can I prepare the dough and icing ahead of time?
Absolutely! The dough benefits from chilling at least 1 hour and can be made a day ahead. The royal icing is best prepared fresh but can be stored covered for a few hours or up to a day, just give it a quick stir before use.
Final Thoughts
Baking the Halloween Cauldron Cookie Creation Recipe is such a joyous way to celebrate the season—fun to make, delightfully spooky, and absolutely delicious to eat. Whether you’re treating yourself or impressing guests at a haunted gathering, these cookies bring charm and tasty magic to your Halloween festivities. Grab your apron and dive into this sweet, creative adventure—you won’t want to stop at just one!
“`
Print
Halloween Cauldron Cookie Creation Recipe
- Prep Time: 1 hour 30 minutes
- Cook Time: 10 minutes
- Total Time: 15 hours (including icing drying time)
- Yield: 24 cookies
- Category: Dessert
- Method: Baking
- Cuisine: American
Description
Create spooky and festive Halloween Cauldron Cookies decorated with colorful royal icing to resemble bubbling witch potions. These soft and chewy cookies combine chocolate chips and candy corn for a delightful seasonal treat perfect for Halloween parties and celebrations.
Ingredients
Cookie Dough
- 1 cup unsalted butter, softened
- 1 cup granulated sugar
- 1 cup brown sugar, packed
- 2 large eggs
- 2 teaspoons vanilla extract
- 3 cups all-purpose flour
- 1 teaspoon baking soda
- 1/2 teaspoon salt
- 1 cup chocolate chips
- 1 cup candy corn
Royal Icing
- 4 cups powdered sugar, sifted
- 3 tablespoons meringue powder
- 1/2 teaspoon clear vanilla extract
- 6–8 tablespoons warm water
- Green gel food coloring
- Purple gel food coloring
- Black gel food coloring
- White gel food coloring
- Orange gel food coloring (optional)
- Edible glitter (optional)
- Various Halloween sprinkles (optional)
- Small candy eyes (optional)
Instructions
- Prepare Cookie Dough: In a bowl, whisk together 3 cups all-purpose flour, 1 teaspoon baking soda, and 1/2 teaspoon salt to combine the dry ingredients thoroughly. In a stand mixer, cream 1 cup softened unsalted butter with 1 cup granulated sugar and 1 cup packed brown sugar until the mixture is light and fluffy. Beat in 2 large eggs and 2 teaspoons vanilla extract until well combined. Gradually add the dry ingredients to the wet ingredients, mixing until just incorporated. Stir in 1 cup chocolate chips and 1 cup candy corn gently to distribute evenly throughout the dough. Chill the dough in the refrigerator for at least 1 hour to firm up before rolling.
- Bake Cookies: Preheat your oven to 375°F (190°C). On a lightly floured surface, roll out the chilled dough to a thickness of 1/4 inch. Cut into cauldron shapes using a cookie cutter or alternatively scoop dough for drop cookies. Transfer cookies carefully onto parchment-lined baking sheets, spacing them evenly. Bake in the preheated oven for 8 to 10 minutes or until the edges are just lightly set and the centers remain soft. Remove from oven and allow cookies to cool completely on a wire rack to prepare for decorating.
- Prepare Royal Icing: Sift 4 cups powdered sugar together with 3 tablespoons meringue powder to remove lumps. Add 1/2 teaspoon clear vanilla extract for flavor and 6 to 8 tablespoons of warm water gradually while beating the mixture. Beat the icing until it reaches thick, glossy consistency with stiff peaks, taking about 5 to 7 minutes. Adjust the icing consistency as needed: thicker (toothpaste consistency) for outlining details and thinner (honey consistency) for flooding large areas. Divide the royal icing into separate bowls and mix in green, purple, black, white, and optional orange gel food colorings to create your palette. Cover the icing to prevent drying out while working.
- Decorate Cauldron Base: Using black royal icing thinned to outlining consistency, pipe a neat border around each cooled cookie to mimic the shape of a cauldron. Allow the outlines to dry for 10 to 15 minutes to hold their shape. Next, flood the inside of these outlines with black flooding consistency icing, spreading evenly and gently popping air bubbles with a toothpick or scribe tool. Let the black base icing dry completely for several hours or ideally overnight to achieve a smooth, solid surface.
- Add Bubbling Potion: Once the black icing base is fully dry, pipe an irregular wavy outline along the top edge of the cauldron using green outlining consistency icing to represent the potion surface. Let this outline set for 10 to 15 minutes. Then flood the outlined area with green flooding icing. While still wet, dot small amounts of purple, white, and either black or dark green icing into the green icing. Using a scribe tool, drag through these dots to create swirly, bubbling effects mimicking potion fizz. Allow this layer to dry thoroughly for 6 to 12 hours or overnight before moving on.
- Add Final Spooky Touches: Once all layers of royal icing are completely dry, gently brush edible green or iridescent glitter over the potion area to add shimmer and a magical glow. Attach small candy eyes, Halloween-themed sprinkles, or edible bones by placing tiny dots of royal icing as glue. Let any added decorative accents dry for at least one hour to ensure they set firmly before serving, gifting, or packaging.
Notes
- Ensure the dough is well chilled before rolling to prevent sticking and easier handling.
- Use gel food coloring to avoid adding extra moisture that can thin your royal icing.
- Allow each royal icing layer to dry fully to prevent colors from bleeding together.
- Store decorated cookies in an airtight container at room temperature for up to a week.
- Use a scribe tool or toothpick to pop air bubbles and create detailed designs in the icing.
- Optional edible glitter and sprinkles add festive touches but are not necessary for flavor.

