“`html
If you’re craving soft, buttery bread that makes any meal feel extra special, you have to try this Amazing Homemade Dinner Rolls Recipe. These rolls come out perfectly golden, tender inside, and irresistibly flavorful with a subtle sweetness that’s just right. Whether you’re planning a holiday feast or simply want to elevate your weeknight dinner, these dinner rolls are sure to become a beloved staple in your kitchen.

Ingredients You’ll Need
What I love about this recipe is how it transforms a handful of simple, everyday ingredients into the perfect fluffy dinner rolls. Each component plays a crucial role in creating that soft texture, slight sweetness, and beautiful golden crust that make these rolls so amazing.
- 3/4 cup scalded milk (whole or 2%): This step adds a lovely richness and helps create a tender crumb by softening the flour’s proteins.
- 3/4 cup warm water (105°F): Activates the yeast perfectly to ensure a beautiful rise.
- 4 ½ teaspoons active dry yeast: The magic that makes these rolls light and fluffy.
- 1 teaspoon granulated sugar: Feeds the yeast and adds a touch of sweetness.
- 3 large eggs (beaten): Enrich the dough, lending it structure and a soft texture.
- 1/2 cup salted butter (room temperature): Adds incredible flavor and tenderness.
- 1/2 cup granulated sugar: Balances savory and sweet, creating a delectable flavor.
- 5 ½ cups all-purpose flour: The foundation for a perfect dough consistency.
- 1/2 teaspoon salt: Enhances all the flavors beautifully.
- Melted butter or vegetable shortening (for brushing): Gives the rolls a shiny, buttery finish.
How to Make Amazing Homemade Dinner Rolls Recipe
Step 1: Scald the Milk
Begin by gently heating your milk in a saucepan over medium heat just until it’s warm and edges are foamy and bubbly—right before boiling. This softens the proteins and greatly improves the texture of your rolls. Let it cool to lukewarm before mixing it in.
Step 2: Proof the Yeast
Pour the warm water into the bowl of your stand mixer. Sprinkle in the yeast and a teaspoon of sugar, then stir gently. Allow this mixture to rest for about 10 minutes until it’s bubbly and fragrant, which means your yeast is nicely activated and ready to work its magic.
Step 3: Combine Wet Ingredients
Once the yeast is foamy, add the beaten eggs, softened salted butter, and 1/2 cup of sugar to the bowl. Mix everything on low speed just until combined to start building a smooth dough base.
Step 4: Add Flour and Salt
Mix in one cup of flour along with the salt, stirring until just combined. Next, pour in the scalded milk and stir again. This slow integration keeps the dough tender and moist.
Step 5: Finish Adding Flour and Knead
Carefully add the remaining flour, about 1/2 cup at a time, until the dough slightly sticks to your fingers but pulls away from the sides of the bowl. Be mindful not to exceed 5 ½ cups flour total. Knead the dough using your stand mixer with the dough hook on low speed for 8 to 10 minutes—the longer knead develops gluten for that perfect chewy softness.
Step 6: First Rise
Spray a large bowl with nonstick spray, transfer your dough in, cover with a kitchen towel, and let it rise until doubled in size. This takes about 60 to 90 minutes and is the crucial step where the dough develops flavor and volume.
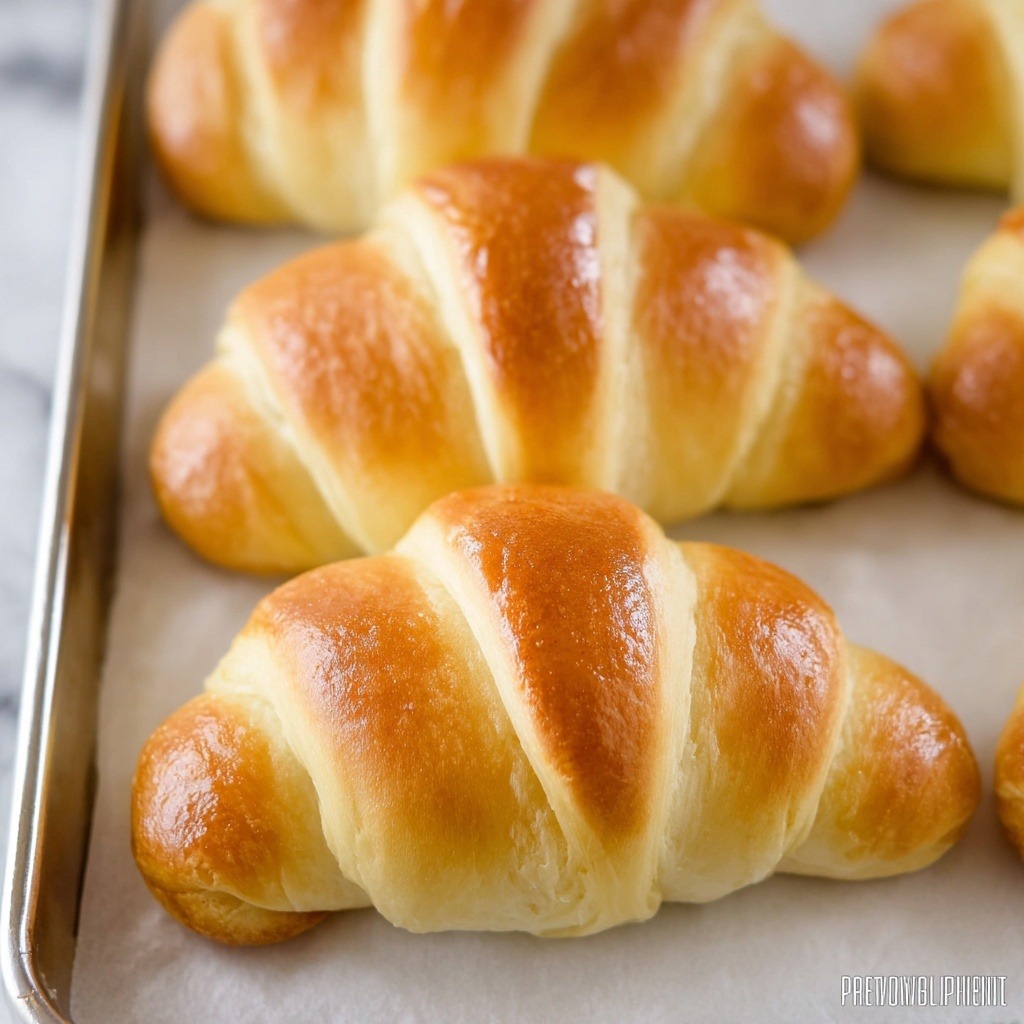
Step 7: Shape the Rolls
After the dough has risen, divide it into two equal halves. Roll each half into a large circle and cut into 12 equal “pie” pieces. Roll each triangular section from the wide end toward the narrow end, creating crescent shapes. Place these rolls evenly spaced on greased baking sheets, cover again, and let them rise another 30 minutes to puff up beautifully.
Step 8: Bake to Perfection
Bake the rolls in a preheated 350°F oven for 14 to 16 minutes, or until their golden-brown tops have you reaching for your oven mitts. Take them out and brush with melted butter or vegetable shortening for a shiny, buttery finish. Now, the real fun begins—dig in and enjoy!
How to Serve Amazing Homemade Dinner Rolls Recipe
Garnishes
For an extra touch of indulgence, brush your warm rolls with additional melted butter infused with fresh herbs like rosemary or thyme. A sprinkle of flaky sea salt or a dusting of garlic powder can also elevate the flavor — perfect for dipping or slathering with butter.
Side Dishes
These rolls are incredibly versatile and pair wonderfully with hearty soups, creamy stews, or your favorite roasted meats. Think classic Thanksgiving turkey, a bowl of rich beef stew, or even alongside a fresh garden salad for a simple yet satisfying meal.
Creative Ways to Present
For dinner parties, arrange the rolls in a rustic woven basket lined with a colorful cloth napkin to invite a cozy vibe. You can also turn these rolls into mini sliders by splitting them open and filling with meats and cheeses, turning your Amazing Homemade Dinner Rolls Recipe into something truly special and memorable.
Make Ahead and Storage
Storing Leftovers
Store your leftover rolls in an airtight container at room temperature where they’ll stay soft and fresh for about 3 to 4 days. Keeping them sealed prevents drying out, so you’ll still enjoy that homemade softness with every bite.
Freezing
If you want to enjoy these rolls later, they freeze beautifully. Simply let the rolls cool completely, then wrap them tightly in plastic wrap and place in a freezer-safe bag. They’ll keep well for up to 3 months without losing their yumminess.
Reheating
To refresh rolls from frozen or refrigerated, warm them in the oven at 300°F for about 10 minutes wrapped loosely in foil, or microwave them wrapped in a damp paper towel for about 20 seconds. This restores their soft texture and warm, buttery flavor.
FAQs
Can I use milk alternatives in this Amazing Homemade Dinner Rolls Recipe?
Yes! You can substitute whole or 2% milk with almond, soy, or oat milk, but make sure to scald and cool these alternatives as well to maintain that tender texture.
What if I don’t have a stand mixer?
No worries! You can mix and knead the dough by hand. Just be prepared to knead on a clean surface for 10 to 15 minutes until the dough is smooth and elastic.
Is it important to scald the milk?
Scalding the milk is key to tender, soft dinner rolls because it breaks down proteins and helps the dough rise better. It’s a small step that makes a big difference!
Can I make smaller or larger rolls?
Absolutely! Just adjust the baking time slightly. Smaller rolls may bake a few minutes faster, while larger ones might need more time — keep an eye on the golden color as your cue.
How do I know when the dough has risen enough?
The dough should roughly double in size, and when gently pressed with a finger, the indentation will remain instead of bouncing back immediately.
Final Thoughts
I can’t recommend this Amazing Homemade Dinner Rolls Recipe enough — it’s truly a game-changer when it comes to homemade bread. Whether you’re serving them up for a special occasion or just to make a regular dinner feel extraordinary, these rolls bring warmth, comfort, and loads of deliciousness to your table. Give this recipe a try, and watch these golden beauties become a new family favorite!
“`
Print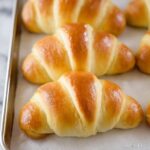
Amazing Homemade Dinner Rolls Recipe
- Prep Time: 30 minutes
- Cook Time: 16 minutes
- Total Time: 2 hours 14 minutes
- Yield: 24 servings
- Category: Bread
- Method: Baking
- Cuisine: American
Description
These Amazing Dinner Rolls are soft, fluffy, and slightly sweet, perfect for any dinner table. Made with scalded milk, warm water, and yeast, these rolls rise twice for a beautifully light texture. They bake to a golden-brown finish and are brushed with melted butter for an irresistible, buttery crust. Ideal as a side for any meal or for sandwiches, these classic dinner rolls delight with every bite.
Ingredients
Wet Ingredients
- 3/4 cup scalded milk (whole or 2%)
- 3/4 cup warm water (105°F)
- 3 large eggs (beaten)
- 1/2 cup salted butter (room temperature)
- Melted butter or vegetable shortening (for brushing on top of baked rolls)
Dry Ingredients
- 4 ½ teaspoons active dry yeast
- 1 teaspoon granulated sugar (for proofing yeast)
- 1/2 cup granulated sugar
- 5 ½ cups all-purpose flour
- 1/2 teaspoon salt
Instructions
- Scald the Milk: Pour milk into a saucepan and heat over medium heat until it becomes warm and the edges are foamy and bubbly, just before boiling. Remove from heat and let it cool until lukewarm to prepare for mixing.
- Proof the Yeast: In the bowl of a stand mixer fitted with a dough hook, pour the warm water. Add the active dry yeast and 1 teaspoon sugar, stir gently, and let it proof for 10 minutes or until the mixture is foamy and bubbly, indicating the yeast is activated.
- Combine Wet Ingredients: Add the beaten eggs, softened salted butter, and 1/2 cup granulated sugar to the yeast mixture. Mix on low speed until just combined to avoid overmixing.
- Add Flour and Salt, Then Milk: Add 1 cup of the flour along with the salt to the mixture and mix until just combined. Then pour in the lukewarm scalded milk and mix again to incorporate all ingredients evenly.
- Incorporate Remaining Flour: Gradually add the remaining flour in 1/2 cup increments while mixing, until the dough reaches a consistency that slightly sticks to fingers and pulls away from the sides of the bowl. Do not exceed 5 ½ cups flour.
- Knead the Dough: With the stand mixer on low speed, knead the dough using the dough hook attachment for 8 to 10 minutes until smooth and elastic.
- First Rise: Spray a large bowl with nonstick spray, place the kneaded dough inside, and cover with a kitchen towel. Allow the dough to rise in a warm spot until it doubles in size, about 60 to 90 minutes.
- Shape the Rolls: Punch down the risen dough, divide it into two halves. Roll each half into a large circle and cut each into 12 equal triangular pieces. Roll each triangle starting from the wide end towards the pointed end, forming a crescent shape. Place the rolls on greased baking sheets.
- Second Rise: Cover the shaped rolls with a kitchen towel and let them rise again until doubled, about 30 minutes.
- Bake: Preheat oven to 350°F (175°C). Bake the rolls for 14 to 16 minutes or until the tops are golden brown and the rolls sound hollow when tapped.
- Finish and Serve: Remove the rolls from the oven and brush the tops with melted butter or vegetable shortening to give them a shiny, flavorful finish. Serve warm and enjoy!
Notes
- Scalding the milk helps develop the gluten and improves the texture of the rolls.
- Make sure the water for yeast proofing is warm but not hot (around 105°F) to activate yeast without killing it.
- Do not exceed the flour amount to ensure the rolls stay soft and tender.
- Allowing the dough to rise twice ensures a light and fluffy texture.
- Brush with melted butter while warm for extra flavor and a soft crust.


