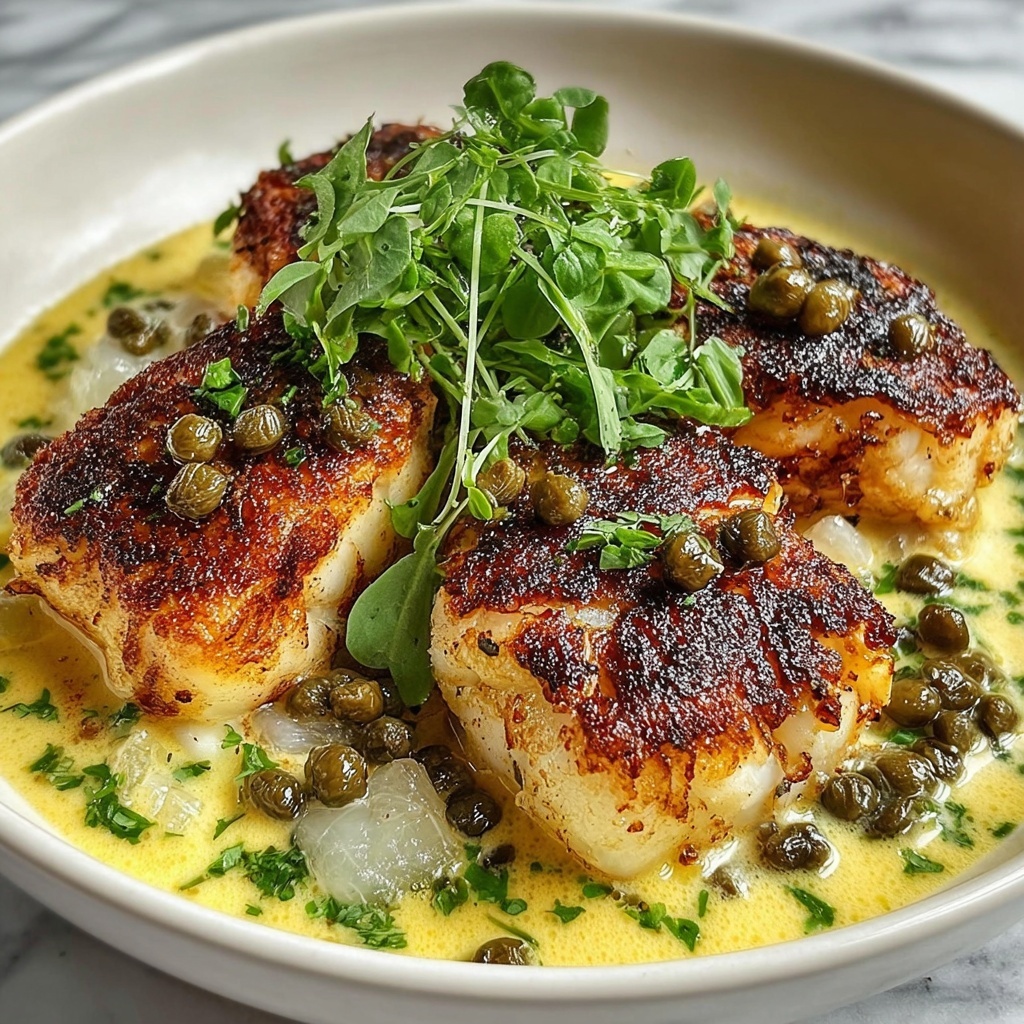
If you are searching for a bright, tangy, and utterly delicious seafood dish to wow your family and friends, look no further than this Cod Piccata Recipe. A perfect combination of flaky, tender cod fillets bathing in a zesty lemon-caper butter sauce makes this dish an absolute showstopper. Whether you’re cooking a stress-free weeknight dinner or impressing guests, this Cod Piccata Recipe brings a beautiful balance of flavors and an irresistible aroma that will have everyone asking for seconds.
Ingredients You’ll Need
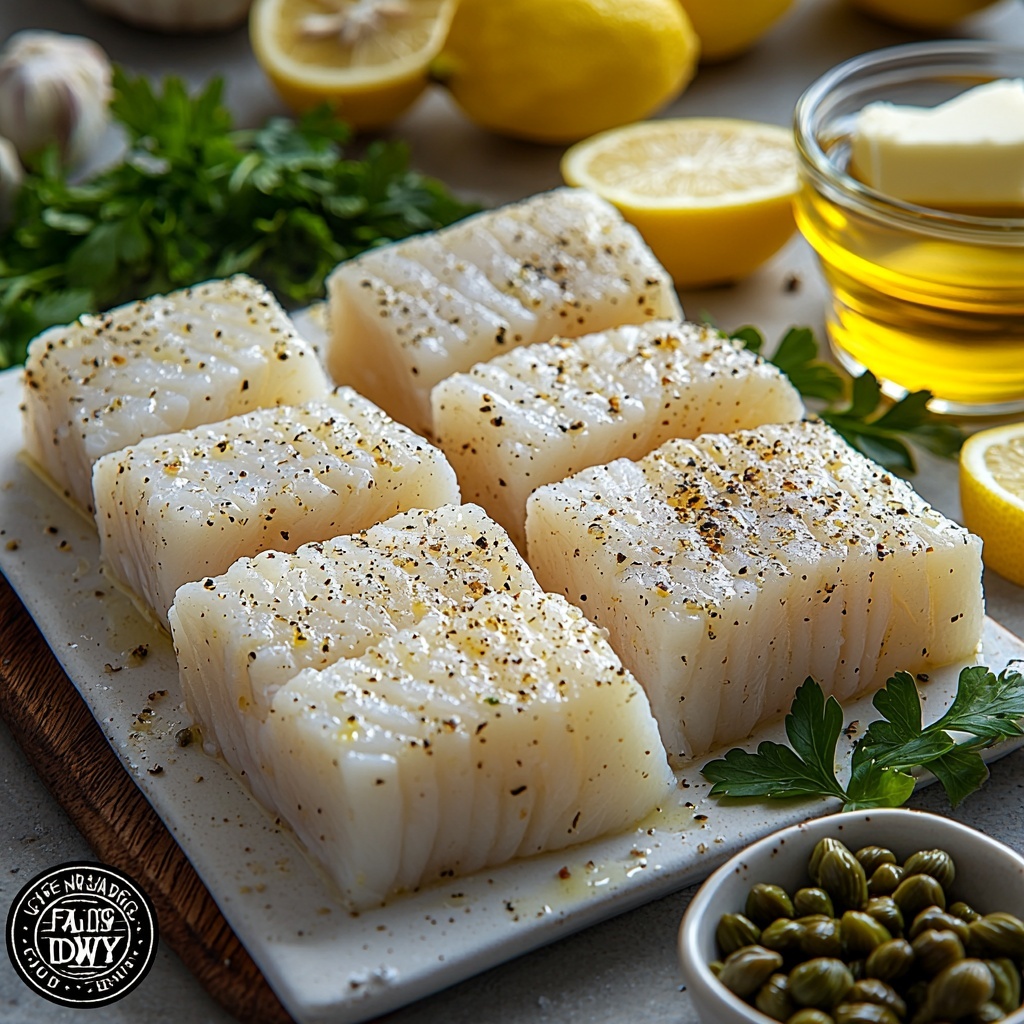
These simple but essential ingredients come together harmoniously, each playing a crucial role in delivering taste, texture, and color. The fresh lemon juice infuses brightness, capers add delightful bursts of tang, and butter contributes richness to this classic sauce.
- 4 cod fillets (about 6 ounces each): The star of the dish, providing mild, flaky white fish perfect for soaking up the sauce.
- Salt and pepper, to taste: Essential seasonings that bring out the natural flavors of the cod.
- 1/2 cup all-purpose flour: Used for a light dredge that creates a delicate crust to hold the sauce beautifully.
- 2 tablespoons olive oil: Adds a subtle fruitiness and serves as the cooking fat for searing the fish.
- 2 tablespoons unsalted butter: Adds richness and silkiness to the sauce when melted.
- 2 cloves garlic, minced: Provides fragrant depth and a savory touch to the lemony sauce.
- 1/4 cup fresh lemon juice (about 2 lemons): Delivers the signature tartness that defines piccata dishes.
- 1/2 cup low-sodium chicken broth: Balances the acidity and adds a subtle savory backdrop to the sauce.
- 2 tablespoons capers, rinsed and drained: Lively and salty, these little bursts of flavor elevate every bite.
- Fresh parsley, finely chopped (for garnish): A fresh herb that brightens the dish visually and aromatically.
- Lemon slices (for garnish): Adds a pop of cheerful color and reinforces the citrus notes.
How to Make Cod Piccata Recipe
Step 1: Season the Cod Fillets
Begin by seasoning each cod fillet generously with salt and pepper on both sides. Proper seasoning at this stage brings out the natural flavors of the fish and ensures every bite is well balanced and savory.
Step 2: Dredge in Flour
Next, spread the all-purpose flour on a plate and gently coat each fillet, making sure to shake off any excess. This light dredging forms a delicate crust that helps the fish brown beautifully and hold onto the sauce later on.
Step 3: Heat the Pan with Oil and Butter
In a large skillet set over medium-high heat, warm the olive oil along with one tablespoon of butter. This combination provides the ideal cooking fat that will give the cod a gorgeous golden sear without sticking.
Step 4: Cook the Cod
Carefully lay the dredged cod fillets in the hot skillet and cook for about 3 to 4 minutes on each side. Look for a golden-brown crust and tender white flesh that flakes easily. Remove the cooked fish to a plate and keep warm.
Step 5: Sauté the Garlic
In the same skillet, add the minced garlic and sauté for roughly 30 seconds, just until fragrant. This brief cooking releases the garlic’s aroma without burning it, laying the foundation for your luscious sauce.
Step 6: Add Lemon Juice and Chicken Broth
Pour in the fresh lemon juice and the low-sodium chicken broth, scraping the skillet’s browned bits with a wooden spoon. These flavorful bits add an irresistible depth to the sauce you are creating.
Step 7: Stir in Capers and Simmer
Add the rinsed and drained capers to the skillet, then bring the mixture to a gentle simmer. This allows the flavors to meld and intensify, giving the sauce its distinctive tangy and salty character.
Step 8: Finish the Sauce with Butter
Reduce the heat to low, then whisk in the remaining tablespoon of butter until it gently thickens the sauce and adds a glossy sheen. Taste the sauce and adjust salt and pepper as needed for the perfect balance.
Step 9: Return the Cod to the Skillet
Gently place the cooked cod fillets back into the skillet, spooning the sauce generously over them. Warm everything through for an additional minute so the flavors can marry beautifully.
Step 10: Garnish and Ready to Serve
Finally, garnish your Cod Piccata Recipe with freshly chopped parsley and bright lemon slices. These finishing touches add a pop of color and a fresh aroma that make the dish even more inviting.
How to Serve Cod Piccata Recipe
Garnishes
Fresh parsley and lemon slices are essential garnishes for this Cod Piccata Recipe. They not only add vibrant color but also introduce a fresh floral note and extra citrus zing that makes each bite come alive.
Side Dishes
This dish pairs wonderfully with light, simple sides that let the cod shine. Try it alongside garlic mashed potatoes, steamed asparagus, or a crisp green salad. These complement the savory and tangy flavors without overwhelming your palate.
Creative Ways to Present
For a stylish twist, serve your Cod Piccata on a bed of creamy risotto or saffron-infused rice. You can also drizzle extra sauce over the fish tableside to add a bit of showmanship. Consider garnishing with edible flowers or microgreens for a vibrant finish.
Make Ahead and Storage
Storing Leftovers
Store any leftover cod and sauce in an airtight container in the refrigerator. It will keep well for up to two days, allowing you to enjoy the vibrant flavors again without missing a beat.
Freezing
While it’s best enjoyed fresh, you can freeze cooked cod piccata if necessary. Wrap the fish and sauce tightly in freezer-safe containers or bags, then freeze for up to one month. Thaw gently overnight in the refrigerator before reheating.
Reheating
To reheat, warm the cod gently in a skillet over low heat to avoid drying out the fish. Spoon some additional sauce over the fillets while warming to retain moisture and flavor. Avoid microwaving if possible, as it can make the fish tough.
FAQs
Can I use other types of fish for this Cod Piccata Recipe?
Absolutely! While cod is ideal due to its texture and mild flavor, you can substitute with other firm white fish like halibut, sole, or tilapia. Just be mindful of cooking times, as thinner fillets may cook faster.
How can I make this dish gluten-free?
Simply replace the all-purpose flour with a gluten-free alternative such as rice flour or almond flour for dredging. This tweak keeps the crispy coating intact while making the recipe suitable for gluten-sensitive eaters.
What if I don’t have fresh lemons?
Fresh lemon juice is key to getting that bright, vibrant piccata flavor, but in a pinch, bottled lemon juice can work. Just use a little less and adjust to taste, as bottled juices are usually more concentrated and less fresh-tasting.
Is there a way to make this recipe dairy-free?
Yes! Skip the butter and substitute it with olive oil or a dairy-free margarine. This will slightly change the richness of the sauce but still yield a delicious, tangy piccata that’s suitable for dairy-free diets.
Can this recipe be doubled for a larger crowd?
Definitely. The Cod Piccata Recipe scales up well, just be sure to cook the fillets in batches to avoid overcrowding the pan, which can prevent a nice sear. Keep cooked fish warm while finishing the rest.
Final Thoughts
This Cod Piccata Recipe is one of those dishes that feels effortlessly elegant but comes together in no time, making it perfect for any occasion. Its lively lemon-caper sauce paired with perfectly seared cod creates a symphony of flavors that are bound to become a family favorite. I can’t wait for you to try it and experience just how special homemade piccata can be!
Print
Cod Piccata Recipe
- Prep Time: 15 minutes
- Cook Time: 15 minutes
- Total Time: 30 minutes
- Yield: 4 servings
- Category: Main Course
- Method: Frying
- Cuisine: Italian
Description
This Cod Piccata recipe features tender cod fillets cooked to golden perfection and served with a tangy lemon, caper, and butter sauce. Perfect for a light and flavorful dinner, this dish combines the zesty brightness of lemon with the savory richness of butter and the briny punch of capers, garnished with fresh parsley and lemon slices. Ready in just 30 minutes, it’s an elegant yet easy meal to prepare any night of the week.
Ingredients
Fish
- 4 cod fillets (about 6 ounces each)
- Salt and pepper, to taste
- 1/2 cup all-purpose flour (for dredging)
Cooking Fat & Sauce
- 2 tablespoons olive oil
- 2 tablespoons unsalted butter
- 2 cloves garlic, minced
- 1/4 cup fresh lemon juice (about 2 lemons)
- 1/2 cup low-sodium chicken broth
- 2 tablespoons capers, rinsed and drained
Garnish
- Fresh parsley, finely chopped
- Lemon slices
Instructions
- Season the Cod: Season the cod fillets generously with salt and pepper on both sides to enhance the flavor.
- Prepare the Coating: Spread the flour evenly on a plate and gently coat each cod fillet on both sides with flour, shaking off any excess to ensure a light crust.
- Heat the Pan: In a large skillet over medium-high heat, heat the olive oil with 1 tablespoon of butter until melted and hot, ready for cooking the fish.
- Cook the Cod: Carefully place the dredged cod fillets in the hot skillet and cook for 3-4 minutes on each side until golden brown and cooked through. Remove and set aside.
- Sauté Garlic: In the same skillet, add minced garlic and sauté for about 30 seconds until fragrant to infuse the sauce with flavor.
- Add Lemon Juice and Broth: Pour in fresh lemon juice and low-sodium chicken broth, scraping the bottom of the skillet to lift any browned bits into the sauce.
- Add Capers and Simmer: Stir in rinsed capers and bring the mixture to a simmer to meld the flavors.
- Finish the Sauce: Reduce heat to low and whisk in remaining tablespoon of butter until the sauce slightly thickens. Adjust seasoning with salt and pepper if needed.
- Reheat Cod: Return cooked cod fillets to the skillet, spoon sauce over them and warm through for 1 additional minute to blend flavors.
- Garnish and Serve: Garnish with freshly chopped parsley and lemon slices before serving for color and a fresh aroma.
Notes
- Use fresh cod for best flavor and texture.
- Be careful not to overcook the fish to keep it tender and flaky.
- Capers add a salty, tangy bite—rinse well to adjust saltiness.
- For a gluten-free option, substitute all-purpose flour with gluten-free flour for dredging.
- This dish pairs well with steamed vegetables, rice, or crusty bread.

