“`html
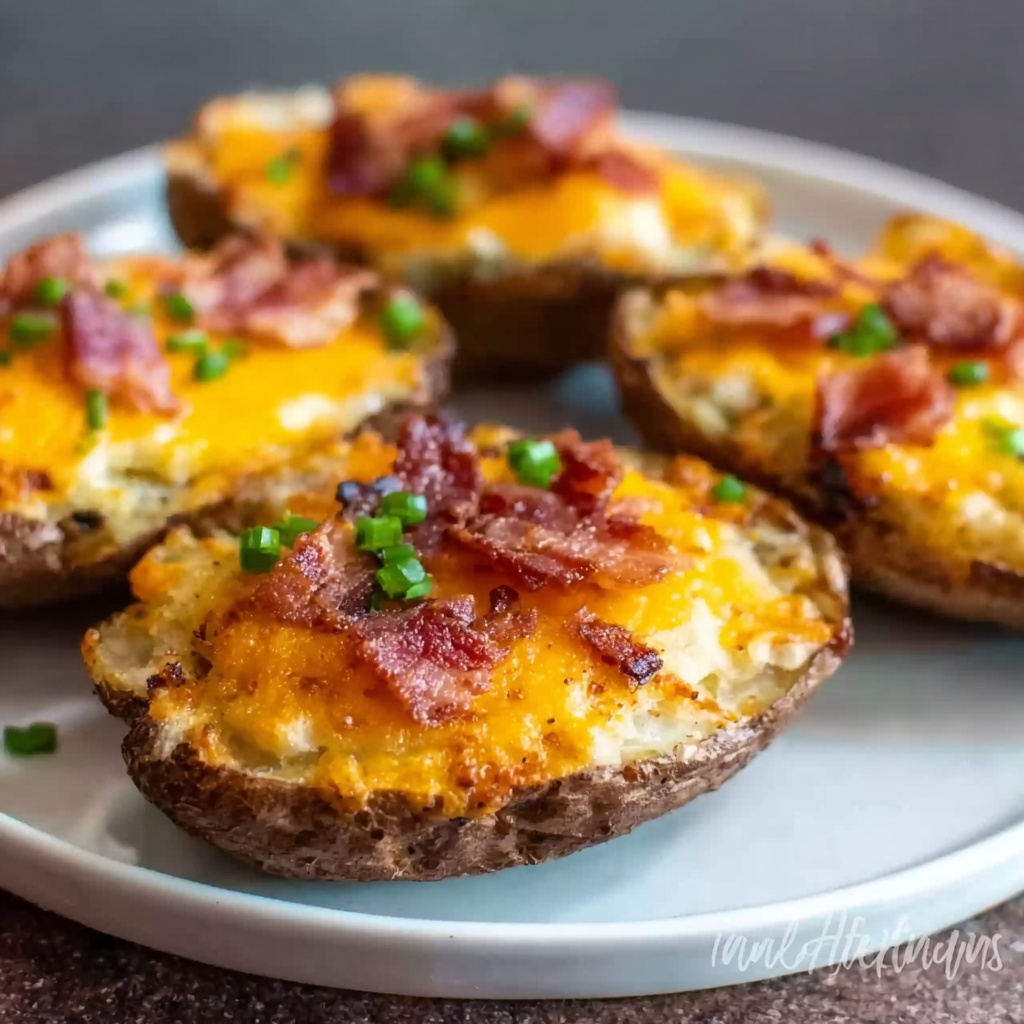
If you love snacks that bring together crispy, cheesy, and savory in every bite, then you are in for a real treat with this Loaded Potato Skins Recipe. These golden, crunchy potato boats, filled with sharp cheddar, smoky bacon, and fresh green onions, are not only ridiculously delicious but also surprisingly simple to make. Each crispy skin holds a perfect balance of textures and flavors that will have your friends asking for seconds — trust me, these are absolute crowd-pleasers whether for a casual get-together or just a cozy night in.
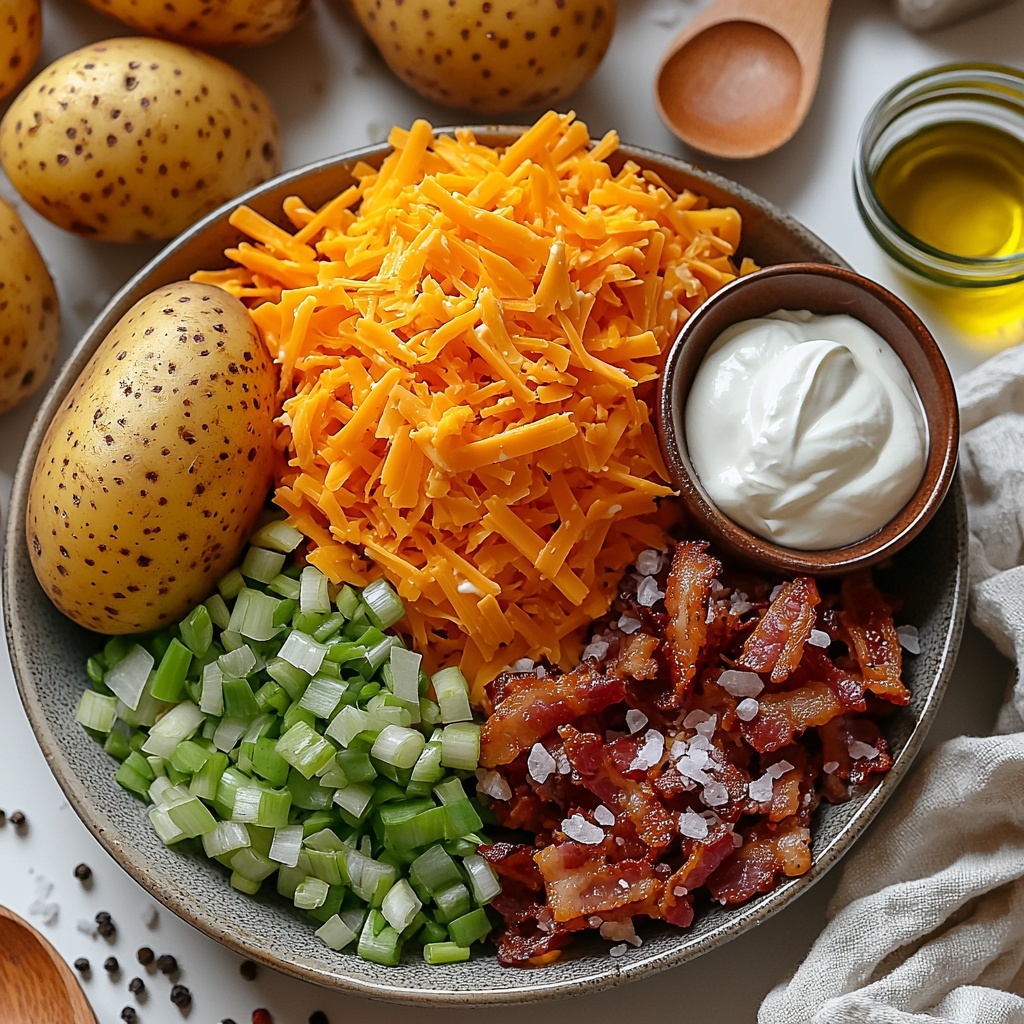
Ingredients You’ll Need
The magic behind this Loaded Potato Skins Recipe lies in its straightforward ingredients. Each one plays a vital role: the Russet potatoes form the sturdy, crispy base; sharp cheddar cheese adds that irresistible melty, tangy richness; bacon brings smoky crunch; and green onions provide a fresh, vibrant punch. Let’s not forget the olive oil, which helps achieve that golden crisp perfect potato skin texture, while sour cream offers a creamy cooling touch to finish.
- 4 large Russet potatoes: The ideal spud for crispy skins thanks to their starchy interior and thick peel.
- 1 1/2 cups shredded sharp cheddar cheese: Sharpness balances the richness and melts beautifully over the skins.
- 6 slices bacon, cooked and crumbled: Adds smoky, crispy texture that brings the whole dish to life.
- 3 green onions, chopped: Fresh and mildly pungent, they brighten the overall flavor.
- 1/2 cup sour cream, for serving: Provides a creamy cooling contrast to the savory toppings.
- 2 tablespoons olive oil: Essential for crisping the skins to golden perfection without drying them out.
- Salt, to taste: Enhances all the natural flavors in the dish.
- Black pepper, to taste: Adds a hint of heat and depth.
How to Make Loaded Potato Skins Recipe
Step 1: Bake the Potatoes
Start by scrubbing your Russet potatoes thoroughly to remove any dirt. Poke several forks holes into each potato, then rub the skins with olive oil and sprinkle salt over them. Bake at 400°F (200°C) for 45 to 60 minutes until they’re tender inside and the skins turn a crispy, appetizing golden brown. This stage is crucial as it creates that perfect base texture you want in your Loaded Potato Skins Recipe.
Step 2: Prepare the Skins
Once the potatoes are cool enough to handle, slice them lengthwise to create two halves each. Carefully scoop out the soft potato flesh, leaving around a quarter-inch layer of potato along the skin to keep their structure firm and sturdy. Don’t throw away the scooped potato pulp — save it for mashed potatoes or another creative use!
Step 3: Crisp the Potato Shells
Brush the hollowed-out skins with some more olive oil. Lay them skin side up on a baking sheet and pop them into a 450°F (230°C) oven for 10 minutes to get incredibly crispy. Then flip the skins over and bake for another 5 minutes. This extra step ensures these potato skins become delightfully crunchy, making every bite satisfyingly textured.
Step 4: Add Toppings and Bake
Time to pile on the good stuff! Fill each crispy shell with shredded sharp cheddar, sprinkle generously with crispy bacon bits, and finish with the chopped green onions. Return the loaded skins to the oven and bake for another 5 to 7 minutes until the cheese melts into a bubbly, golden delight. This melting stage brings together all the flavors harmoniously in your Loaded Potato Skins Recipe.
Step 5: Serve and Garnish
Once baked, remove your loaded skins from the oven and crown each one with a dollop of creamy sour cream. Add a little extra chopped green onion or chives on top for a fresh, colorful garnish. Serve warm and watch these irresistible little bundles disappear quickly!
How to Serve Loaded Potato Skins Recipe
Garnishes
The beauty of the Loaded Potato Skins Recipe is the ability to customize garnishes to your taste. Sour cream adds a luscious, cooling touch that contrasts perfectly with the sharp cheddar and salty bacon. For a little extra pop, sprinkle some chopped fresh chives or green onions on top. A dash of paprika or a drizzle of ranch dressing can also take your garnishing game up a notch.
Side Dishes
These loaded potato treats shine as appetizers, but they can easily hold their own alongside lighter sides. Consider pairing them with a crisp green salad or some tangy coleslaw to balance the richness. If you’re aiming for a heartier meal, a bowl of tomato soup or chili complements the bold flavors while keeping the vibe cozy and satisfying.
Creative Ways to Present
Want to impress your guests? Serve your loaded potato skins on a rustic wooden board or a colorful platter to add visual interest. You can also offer a little toppings bar with extras like jalapeños, diced tomatoes, or even guacamole, so everyone can customize their skins. For parties, try bite-sized mini-skins by using smaller potatoes — they’re perfect finger food that’s just as flavorful.
Make Ahead and Storage
Storing Leftovers
If you happen to have leftovers — though it’s unlikely! — store them in an airtight container in the refrigerator for up to 3-4 days. Make sure they’re completely cooled before sealing, to prevent sogginess from moisture buildup.
Freezing
You can freeze cooked loaded potato skins, but keep in mind that the texture of the skins may soften slightly upon thawing. To freeze, place the cooled skins on a baking sheet lined with parchment paper and freeze until solid. Then transfer them to a freezer-safe bag or container. They’ll keep well for about 1 month.
Reheating
To get back that original crispy texture, reheat leftovers or frozen potato skins in an oven preheated to 400°F (200°C) for about 10-15 minutes. Avoid microwaving as it tends to make them soggy. A quick broil at the end can help re-crisp the cheese and bacon topping perfectly.
FAQs
Can I use other types of potatoes for this Loaded Potato Skins Recipe?
Russet potatoes are best because of their thick skin and fluffy interior, perfect for crisping up and holding toppings. However, you can try Yukon Gold potatoes for a creamier texture, though the skins won’t be as crispy.
How do I make this recipe vegetarian?
Simply omit the bacon and add extra cheese or substitute with sautéed mushrooms or caramelized onions for a rich, smoky flavor without meat.
Can I prepare the potato skins ahead of time?
Yes, you can bake and scoop the potatoes in advance, then refrigerate the skins separately. Just crisp and fill them right before serving to maintain maximum crunch and freshness.
What can I do with the scooped-out potato flesh?
Don’t throw away that golden goodness! You can mash it with butter and seasoning for a classic side, or mix it into soups, stews, or even potato pancakes.
Is there a way to make these gluten-free?
Absolutely! The basic Loaded Potato Skins Recipe is naturally gluten-free as long as your toppings (cheese, bacon, sour cream) are free from gluten-containing additives.
Final Thoughts
This Loaded Potato Skins Recipe embodies everything wonderful about comfort food — crispy textures, rich flavors, and simple ingredients coming together to create magic. Whether you’re cooking for a crowd or just craving a hearty snack, these potato skins will never disappoint. Go ahead, try this recipe, and enjoy a satisfying, flavor-packed treat that’s sure to become one of your favorites!
“`
Print
Loaded Potato Skins Recipe
- Prep Time: 15 minutes
- Cook Time: 1 hour 15 minutes
- Total Time: 1 hour 30 minutes
- Yield: 8 servings
- Category: Appetizer
- Method: Baking
- Cuisine: American
Description
Crispy, golden loaded potato skins filled with melted sharp cheddar cheese, savory crumbled bacon, and fresh green onions, served with a dollop of creamy sour cream. Perfect as a hearty appetizer or snack.
Ingredients
Main Ingredients
- 4 large Russet potatoes
- 1 1/2 cups shredded sharp cheddar cheese
- 6 slices bacon, cooked and crumbled
- 3 green onions, chopped
- 1/2 cup sour cream, for serving
- 2 tablespoons olive oil
- Salt, to taste
- Black pepper, to taste
Instructions
- Bake the Potatoes: Scrub the potatoes clean and pierce them with a fork. Rub each potato with olive oil and sprinkle with salt. Place them in a preheated oven at 400°F (200°C) and bake for 45-60 minutes, until the potatoes are tender inside and the skins become crispy and golden brown.
- Prepare the Skins: Allow the potatoes to cool enough to handle safely. Slice each potato lengthwise in half. Using a spoon, carefully scoop out the inside flesh, leaving approximately 1/4 inch of potato to maintain the skin’s structure. Reserve the scooped-out potato pulp for another use, such as mashed potatoes.
- Crisp the Potato Shells: Brush the hollowed-out potato skins with olive oil on both sides and place them skin side up on a baking sheet. Bake in a 450°F (230°C) oven for 10 minutes, then flip and bake an additional 5 minutes to achieve extra crispy skins.
- Add Toppings: Spoon shredded sharp cheddar cheese, crumbled cooked bacon, and chopped green onions evenly into each potato skin. Return the stuffed potato skins to the oven and bake for 5-7 minutes until the cheese has melted fully and is bubbling.
- Serve and Garnish: Remove the loaded potato skins from the oven. Top each with a dollop of sour cream and sprinkle with additional chopped green onions or chives if desired. Serve warm as a delicious appetizer or snack.
Notes
- Select Russet potatoes for the best crispy skin texture and fluffy interior.
- Be careful not to scoop out too much potato flesh to prevent the skins from breaking.
- Use sharp cheddar cheese for a strong, tangy flavor that melts well.
- Bacon can be cooked in the oven or a skillet ahead of time for convenience.
- These potato skins are great served with additional condiments like ranch dressing or hot sauce.

