
If you’re on the hunt for a dessert that’s both luscious and delightfully different, then this Salted Honey Pie Recipe is about to become your new obsession. Imagine a creamy custard infused with rich honey sweetness, nestled in a flaky pie crust, and finished with a sprinkle of flaky sea salt that perfectly balances each bite. It’s the kind of dessert that feels like a warm hug after a long day, blending sweet and salty in an irresistibly smooth texture. Whether you’re serving it up for a special occasion or just treating yourself, this Salted Honey Pie Recipe will impress everyone at your table with its gourmet flair and comforting flavors.
Ingredients You’ll Need
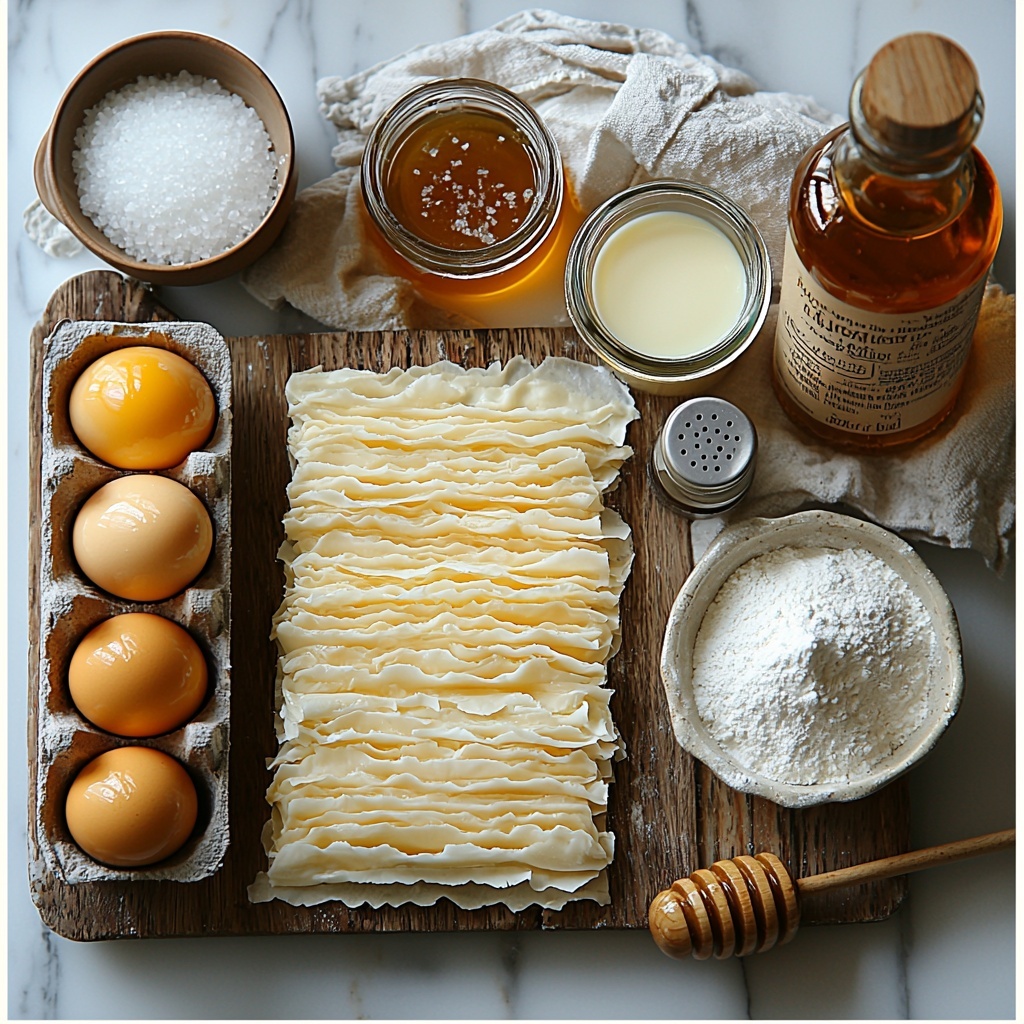
Believe me when I say the magic of this Salted Honey Pie Recipe lies in its simplicity. Each ingredient plays a crucial role, contributing a unique element that elevates the whole dessert. From the creamy heavy whipping cream to the subtle warmth of vanilla and the essential honey, every component works together to create that perfect harmony of flavor and texture.
- Pie crust: Use either refrigerated or homemade for a buttery, flaky base that holds the filling beautifully.
- 4 large egg yolks, lightly beaten: Essential for creating that rich, custardy texture.
- 2 1/2 cups (600 ml) heavy whipping cream: Offers creaminess and body to the filling.
- 2/3 cup (150 g) packed light brown sugar: Adds caramel undertones that deepen the flavor.
- 1/3 cup (45 g) cornstarch, sifted: The thickening agent that ensures a smooth, firm custard.
- 1/2 tsp salt: Enhances all the sweet flavors, building a more complex taste.
- 1/2 cup (120 ml) honey: The star ingredient, bringing natural sweetness and a floral depth.
- 2 tsp vanilla extract: Adds aromatic warmth and rounds out the flavor profile.
- Flaky sea salt, for sprinkling: Provides a crunchy, salty finish that takes each bite over the top.
How to Make Salted Honey Pie Recipe
Step 1: Prepare the pie crust
Begin by placing your pie crust in a deep dish 8-inch or 9-inch pie pan. No need to pre-bake it; just chill it in the fridge to keep it firm and prevent shrinking when baked. A cold crust guarantees flakiness thanks to the butter staying solid until oven time. For a little extra pizzazz, sprinkle a touch of sugar on the crust’s surface before baking to get a subtle crunch that pairs wonderfully with the creamy filling.
Step 2: Combine the cream and dry ingredients
In a medium saucepan, stir together the heavy whipping cream, brown sugar, cornstarch, and salt over medium heat. Keep stirring constantly as the mixture slowly heats and thickens, eventually reaching a rolling boil. You’ll be rewarded with the amazing scent of brown sugar caramelizing and a luscious texture that sets the stage for the custard.
Step 3: Temper the egg yolks
Remove the cream mixture from heat and slowly whisk a small amount into the beaten egg yolks to warm them gently. Gradually add more until the yolks and cream are fully combined and smooth. This step is critical—it helps avoid scrambled eggs in your custard and keeps the texture silky smooth.
Step 4: Mix in honey and vanilla
Return the egg and cream mixture to the saucepan and stir until smooth. Add in your honey and vanilla extract, mixing well to infuse the custard with their warm, sweet flavors. The honey enriches the filling’s color and adds a complex sweetness that makes this pie so special, while the vanilla brings a cozy, aromatic background.
Step 5: Pour filling into the chilled crust
Pour the warm but not hot custard base evenly into your chilled pie crust. The filling should have a pale golden tone, promising a creamy, velvety texture once baked. Spread it carefully to avoid air pockets, ensuring each slice will be uniformly delicious.
Step 6: Bake the pie
Bake at 375°F (190°C) for 40-45 minutes. During baking, the filling will bubble and brown gently on top, with the crust edges turning a beautiful golden hue. Don’t be alarmed if the center jiggles slightly when it comes out—that’s perfectly normal and will set with cooling.
Step 7: Cool and chill the pie
Let your pie cool to room temperature on the counter before refrigerating it until cold and firm. This cooling step is key to developing the perfect custard consistency and letting the flavors meld beautifully. After this wait, you’ll slice into a custard that’s smooth and ready to wow.
Step 8: Add the finishing touch
Right before serving, sprinkle flaky sea salt over the pie. This finishing touch pierces the sweetness with lovely salt bursts and adds satisfying texture, making each bite a perfect balance of creamy, sweet, and salty.
Step 9: Slice and serve
Cut into 8 to 10 slices and serve chilled. Each piece offers a delightful crunch from the crust, a rich, creamy honey custard, and that lovely kiss of sea salt that brings it all together. This Salted Honey Pie Recipe is pure home-baked magic.
How to Serve Salted Honey Pie Recipe
Garnishes
Besides the essential sprinkle of flaky sea salt, consider adding a few fresh mint leaves or edible flowers for a pop of color and fresh flavor. A drizzle of additional honey right before serving gives a glossy, inviting shine and reinforces that irresistible sweetness.
Side Dishes
Salted Honey Pie pairs wonderfully with fresh berries, a dollop of lightly whipped cream, or a scoop of vanilla bean ice cream. These sides offer cool, fresh contrasts to the rich custard and highlight its complex flavors.
Creative Ways to Present
For a fancy touch, serve pie slices on individual dessert plates drizzled with honey and sprinkled with crushed toasted nuts like pecans or almonds. Alternatively, wrap leftover slices in parchment with a sprig of rosemary or lavender for an elegant gift or treat.
Make Ahead and Storage
Storing Leftovers
Keep leftovers in an airtight container or covered tightly with plastic wrap in the refrigerator. The pie stays fresh and creamy for up to 3 days, which actually allows the flavors to mature even more deliciously.
Freezing
This pie isn’t ideal for freezing due to its creamy custard base, which can separate when thawed. It’s best enjoyed fresh or refrigerated.
Reheating
Serve the pie chilled for the best texture and flavor. If you prefer it slightly warmer, let it sit at room temperature for 20-30 minutes rather than using heat, to maintain the custard’s silky consistency.
FAQs
Can I use a store-bought pie crust for this Salted Honey Pie Recipe?
Absolutely! A good quality refrigerated crust works wonderfully and saves time. Just be sure to chill it well before pouring in the filling to retain that flaky structure.
What type of honey is best for this recipe?
Choose a mild-flavored honey like clover or wildflower to let the custard’s balanced sweetness shine without overpowering the other ingredients.
Why do I need to temper the egg yolks?
Tempering gently heats the eggs, preventing them from scrambling when combined with the hot cream mixture, which keeps your custard silky and smooth.
Can I make this pie in advance?
Yes, this pie actually benefits from chilling overnight, allowing the custard to fully set and flavors to meld beautifully for an even more decadent experience.
How do I store leftover pie?
Refrigerate leftovers in an airtight container for up to 3 days. This helps preserve the creamy texture and keeps the pie tasting fresh.
Final Thoughts
This Salted Honey Pie Recipe is a true delight that offers a wonderful balance of flavors and textures any dessert lover will adore. It’s surprisingly easy to make yet so special in every slice, perfect for impressing friends or simply indulging yourself. Please do try it out and enjoy every blissful bite—you might just find your new favorite pie.
Print
Salted Honey Pie Recipe
- Prep Time: 35 minutes
- Cook Time: 40 minutes
- Total Time: 1 hour 15 minutes
- Yield: 8-10 slices
- Category: Dessert
- Method: Baking
- Cuisine: American
Description
Salted Honey Pie is a luscious dessert that perfectly balances the rich sweetness of honey with a subtle salty crunch. With a creamy custard filling nestled in a flaky pie crust, this pie offers a warm caramel flavor enhanced by vanilla and a sprinkle of flaky sea salt on top. Ideal for any occasion, this dessert is both elegant and comforting.
Ingredients
Pie Crust
- 1 refrigerated or homemade pie crust (8- or 9-inch)
Filling
- 4 large egg yolks, lightly beaten
- 2 1/2 cups (600 ml) heavy whipping cream
- 2/3 cup (150 g) packed light brown sugar
- 1/3 cup (45 g) cornstarch, sifted
- 1/2 tsp salt
- 1/2 cup (120 ml) honey
- 2 tsp vanilla extract
- Flaky sea salt, for sprinkling
Instructions
- Prepare the Pie Crust: Place the pie crust in an 8-inch or 9-inch deep dish pie pan and chill it in the refrigerator while preparing the filling. There is no need to pre-bake it. Keeping it cold helps prevent shrinking during baking and ensures a flaky texture.
- Make the Cream Mixture: In a medium saucepan over medium heat, combine heavy whipping cream, brown sugar, cornstarch, and salt. Stir constantly until the mixture comes to a rolling boil and thickens slightly, taking care to avoid lumps.
- Temper the Egg Yolks: Remove the saucepan from heat. Slowly ladle a small amount of the hot cream mixture into the beaten egg yolks while whisking continuously to raise their temperature gradually. Then, slowly whisk in the rest of the cream mixture until smooth.
- Combine and Add Flavorings: Pour the tempered egg mixture back into the saucepan, stirring until smooth and well combined. Add honey and vanilla extract, stirring thoroughly to blend the flavors.
- Fill the Pie Crust: Pour the smooth custard mixture into the chilled pie crust, spreading evenly to avoid air pockets. The filling should be warm but not hot.
- Bake the Pie: Place the pie in a preheated oven at 375°F (190°C) and bake for 40-45 minutes. The filling will bubble and the top will brown while the crust edges turn golden. The center may still jiggle slightly when done.
- Cool and Chill: Allow the pie to cool at room temperature so the custard can set further. Refrigerate until completely chilled and firm, enhancing flavor and texture.
- Add Finishing Touch: Before serving, sprinkle flaky sea salt generously over the pie to complement the sweetness and add a crunchy texture.
- Serve: Slice into 8 to 10 portions and serve chilled for a creamy, sweet-and-salty dessert experience.
Notes
- No pre-baking the pie crust is required; chilling is essential to maintain texture.
- Temper the eggs slowly to prevent curdling and ensure smooth custard.
- Do not overbake to avoid a grainy texture in the filling.
- Allow the pie to cool and refrigerate fully for best slicing results.
- Use flaky sea salt for the best contrast and texture on top.
- You can sprinkle sugar on the crust before baking for added crunch and sweetness.


